You can return any time by using the sub-menu at the top of your screen.
Share this

How to Build an Interlocking Concrete Block Retaining Wall in 11 Steps
Whether you’re looking to elevate your home’s curb appeal, extend the usable space of your property, or you’re concerned about mitigating erosion in a sloped area of your yard, installing an interlocking concrete block retaining wall may be the answer.
We’ll explain how to build a retaining wall with interlocking concrete blocks in 11 steps, cover factors to consider before you break ground, and introduce you to our extensive collection of heavy-duty Unilock concrete blocks for your retaining wall.
Explore retaining wall products at Unilock!
What is a Retaining Wall?
A retaining wall is a structure designed to hold back the earth from a higher grade.
In addition to creating additional usable space, a retaining wall can help to increase your property’s value and serve as an aesthetically pleasing backdrop for other outdoor features.
What are Interlocking Concrete Wall Blocks?
Interlocking concrete wall blocks are concrete blocks designed to fit together like a puzzle, in order to build a retaining wall.
These concrete blocks are composed of a cement and aggregate mixture that is molded and then air-dried. To form the wall, concrete blocks are laid side-by-side and interlocked with each other, utilizing the grooves and ridges on their edges.
Tools You’ll Need to Build an Interlocking Concrete Block Retaining Wall
Interlocking concrete blocks allow you to build a retaining wall that’s both secure and aesthetically pleasing. Before you roll up your sleeves and get to work, you’ll need to prepare some tools and equipment, including:
- Shovel: A tool with a broad flat blade used to dig or lift loose materials such as soil, sand, or gravel.
- Mini Excavator: Access to a mini-excavator service or rental
- Rake: A tool with a toothed bar used to distribute loose aggregate materials.
- Gravel: A loose aggregate or rock fragments.
- Plate compactor: A machine used to compact soil, gravel, or asphalt, consisting of a heavy steel plate mounted to a machine that vibrates, compressing the material.
- Rubber mallet: A type of hammer with a soft, non-metallic head used to level blocks or pavers.
- Masonry saw: A power tool that is used to cut thick materials, such as interlocking concrete blocks or pavers.
- Wheelbarrow: A tool that consists of a shallow tray or bucket used to transport materials such as crushed stone, gravel, or sand to the work area.
- Laser Level: To help determine the slope for larger installations.
- Safety gear (P.P.E.): Personal protective clothing that includes gloves, safety glasses or goggles, and other gear designed to protect your body when using power tools.
How to Build an Interlocking Concrete Block Retaining Wall in 11 Steps
Up for a little DIY? Here’s the step-by-step process.
1. Choosing your Retaining Wall Blocks
The first step in the installation process is choosing which interlocking concrete block you will use for your outdoor space.
Interlocking concrete blocks are designed with integral locking features that are meant to ensure secure and stable connections, enhancing the overall structural integrity of your project. Some of these locking features may include a tongue and groove, pins, or concrete adhesive. Aside from their functional purposes, interlocking concrete blocks come in a variety of shapes, sizes, textures, and colors that will elevate any outdoor space to new hardscape heights.
2. Design the Retaining Wall
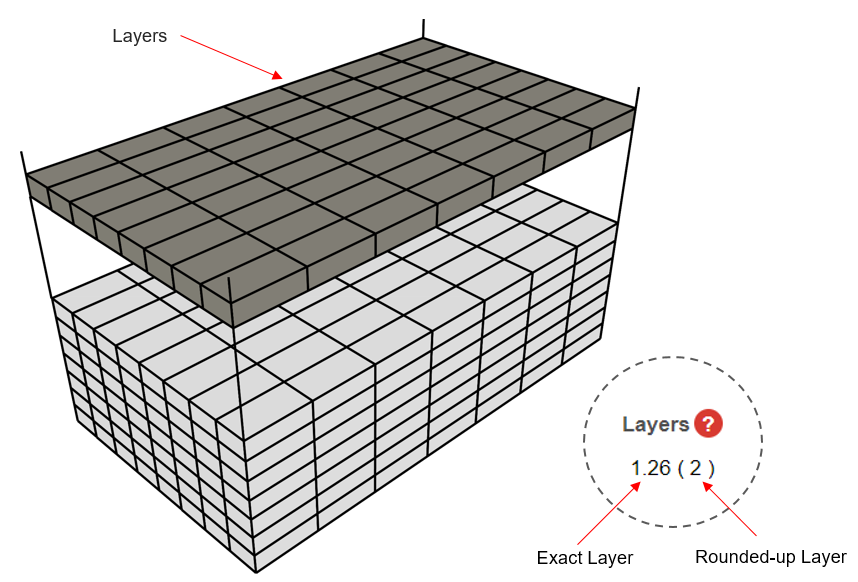
Next, sketch out your interlocking wall on a piece of graph paper or digitally on a computer. Sketch the face of the wall with respect to the grade to help you accurately determine the quantity of retaining wall blocks that you need.
There are two types of retaining walls: structural and non-structural.
A structural retaining wall is one holding up a critical weight such as a driveway, a raised patio, or a swimming pool. Height is also a factor because after a wall reaches more than 2 feet in height, it is automatically deemed structural. Note: Structural walls must be engineered by a qualified engineering professional. Always check with local building codes before you start.
A non-structural wall is a wall that is 2 feet or under and is used for planters and low embankments with no pressure from the upper side. If there is pressure from the upper side, then a wall that is only 18” high could be deemed “structural”. This usually happens along the side of a driveway where the wheels of a vehicle can potentially be near the edge of the wall causing the wall to overturn. In these situations, it is wise to get a consultation from an engineer. Unilock can assist you with preliminary engineering for these situations.
3. Secure a Building Permit
In most cases, if you’re building a retaining wall that’s over 36” in height, you may need to obtain a building permit, if required by the local municipality.
This ensures your retaining wall is safe and complies with local regulations. Taller walls have a higher risk of failure, posing potential hazards to you and your property.
4. Mark the Layout
Once you secure your building permit and are ready to build your wall, mark your layout using grade stakes and string lines.
5. Dig a Trench
Dig a trench along the area where the wall will be built. The depth of the trench must match the height of a single block, plus 6 inches for a gravel base.
For example, if you’re using 6-inch high blocks, you’ll need a trench that is a minimum of 12 inches deep and 2 times the depth of the wall unit wide. The depth of the wall unit is determined by measuring from the front of the unit face to the back of the block. Be sure to compact any loose subsoil before laying your aggregate base.
Gravel Base: All retaining walls need a solid foundation (minimum of 6”) of compacted gravel. The depth of your trench should be the thickness of the Universal Base Pad, plus the thickness of the wall unit that you will be installing, plus 6” of gravel. This gravel can by ¾” clear stone or a road base material which is a mixture of ¾” stone and sand.
Excavating the embankment: There should always be a minimum of 18” of ¾” clear gravel separating the retaining wall from the soil embankment. This will keep the area water and frost free ensuring a solid wall for years to come. It is important to take this into account when excavating the embankment and the base trench.
6. Installing the Base
Install geotextile fabric or a layer of DriveGrid™ directly onto the undisturbed subsoil at the bottom of the trench. The fabric or DriveGrid™ serves as a vital barrier preventing uneven soil settlement. Follow this up by adding a layer of gravel— at least 6 inches deep — to the bottom of the trench to provide drainage. Using a jumping jack, hand tamper, or vibratory plate compactor, compact the gravel base in the trench.
7. Lay the First Interlocking Concrete Wall Blocks
Leveling pads: Universal Base Pad or U-Grip Base Pad should be used whenever possible to ensure a solid installation. Another alternative is to pour a concrete pad, but this must be done precisely and accurately. In some cases, you can level the first row of retaining wall blocks directly on the gravel, but this can be slow and frustrating. Installing a proper base pad is the best way to install a retaining wall that will stand the test of time.
After the leveling pad is in, install the first level of interlocking concrete retaining wall blocks on the pad or the compacted gravel base. If there is a 90-degree corner in the wall, start there and work your way over to the next corner if there is one. Make sure the correct side of the concrete block is facing outwards.
Use a string line to make sure your wall remains straight as you install.
Typically, interlocking concrete blocks do not need adhesive for them to connect, provided the wall is designed with a tongue and groove system that locks units to the one above. If they do not have a locking mechanism, concrete adhesive must be used. This only applies to non-structural walls.
8. Lay the Subsequent Interlocking Concrete Blocks
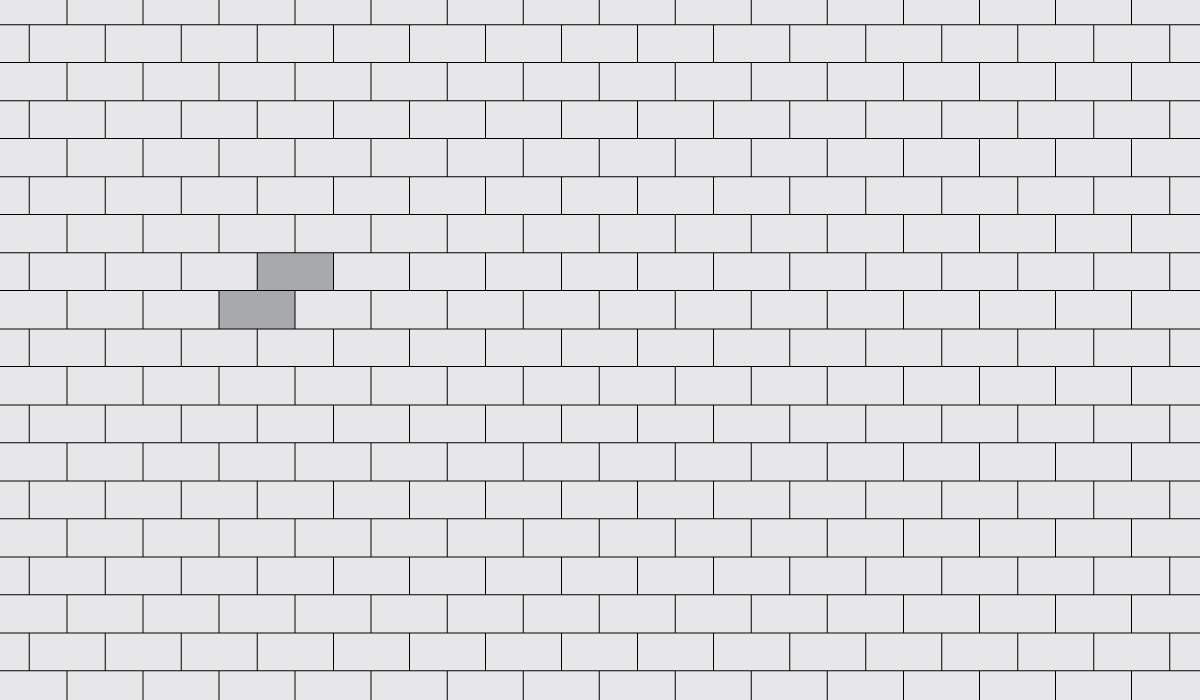
Start the second layer of interlocking concrete blocks again at the corner of the wall, but make a “log-cabin” arrangement that will interlock the corner. Each row should be offset by half the width of the block, creating a brick pattern.
For visual reference, the interlocking concrete block retaining wall units should remain in a running bond pattern.
Unilock tip: Need design inspiration about pavers too? Check out our blog about top paver pattern trends!
9. Cut Blocks to Fit
When you reach the end of the retaining wall, use a masonry saw to cut the blocks to fit as needed, depending on the shape of the wall.
10. Install Coping Units
Once your wall has been built, glue coping units to the top row of blocks using a high-quality concrete adhesive. Ensure that your coping units, as well as the tops of the interlocking concrete blocks are completely dust-free and dry. Curved walls will require that the coping is cut in wedges to coincide with the radius of the wall blocks.
11. Backfill the Retaining Wall
The final step is to backfill the wall with clear ¾” stone gravel to prevent the “drainage zone” from getting clogged up with soil which will result in frost and movement issues.
Backfilling the area behind your retaining wall:
- After all the coping has been cut and glued into place with concrete adhesive, line the embankment behind the retaining wall with landscape fabric. Landscape fabric is used to separate the soil embankment and the granular backfill that is used behind the wall.
- You must have a minimum of 18” – 24” depth of clear stone gravel backfill behind the wall for drainage
- Add this clear stone gravel in 6” layers at a time, compacting each layer with a hand tamper or compactor.
- If you’ve added landscape fabric at the back of the trench, trim it off as you reach the top of the backfill.
- Once the gravel reaches the top of the retaining wall, use a rake to level the surface and create a slight slope away from the wall, to prevent erosion.
- Finish the backfill with a 6-inch layer of topsoil for grass or plants. Always separate the gravel from the soil with filter fabric.
Build your retaining wall with Unilock. Explore our wall options!
Explore Heavy-Duty Unilock Wall Blocks for Your Retaining Wall
At Unilock, we have dedicated over 50 years to creating top-notch outdoor spaces across Canada and the United States. As an industry leader in the retaining wall and paving stones industry, we manufacture high-grade products, while providing unmatched customer service.
Our heavy-duty wall blocks are designed to provide stability, security, and visual appeal to your retaining wall.
From the simple and highly functional to more stylish design options, turn your structural stronghold into a showstopping project with our retaining wall block units.
To build your retaining wall, explore:
- U-Cara – Winner of the internationally acclaimed Red Dot Award, the U-Cara Multi-Face Wall System allows you to mix and match fascia panels along the patented Sure Track Backer Blocks, for limitless design possibilities.
- Pisa™ – Pisa™ is ideal for curved retaining walls. It provides rustic and timeless beauty, thanks to its rough and aged finish.
- Lineo™ – The simple design of Lineo Dimensional Stone makes it a popular choice for contemporary walls, pillars, fire features, grill islands, and other vertical features.
Whether you’re looking to create a retaining wall that extends your property or creates usable space, you can find your unique style with our comprehensive selection at Unilock!
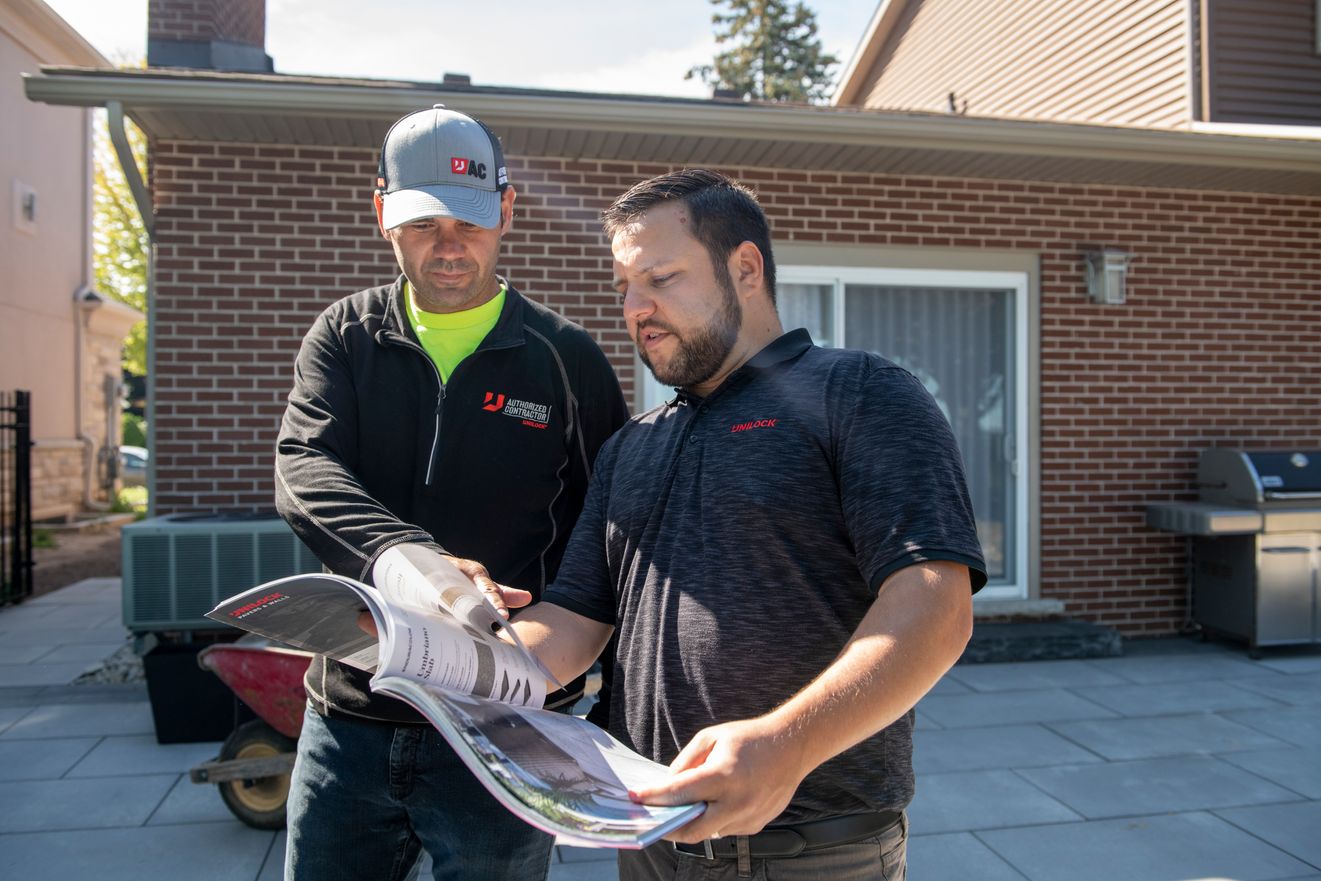
Need expert help building your retaining wall? Find a Unilock Authorized Contractor
Related
Articles
We’re Here To Help
We make it easy to get inspired, plan, and start your project.

See our Catalog of Dreams
Explore ideas, spark inspiration, and see our full range of Unilock products.

Get your freeestimate today
Partner with a Unilock Authorized Contractor for best-in-class results.

Plan your dream project beautifully
Excited to start a new project? Get our Project Planning Guide and plan with ease.